How To Remove Mold From Roof Shingles Easily? (5 Steps)
Written by
Leroy Whitt
If you’ve noticed dark streaks or patches on your roof, you’re probably wondering how to remove mold from roof shingles without causing damage. Mold is more than just an eyesore. It can eat away at shingles, shorten the lifespan of your roof, and reduce your home’s overall value. Fortunately, with the right preparation and cleaning methods, you can restore your roof safely and effectively.
- Curb appeal boost: Removing mold instantly freshens up your roof and improves exterior appearance.
- Extended roof life: A clean, mold-free roof helps shingles last longer.
- Healthier home environment: Mold spores can affect air quality around your home.
This guide will walk you through why mold forms, how to clean it step by step, and what you can do to prevent it from returning in the future.
🦠 Why Mold Grows on Roof Shingles
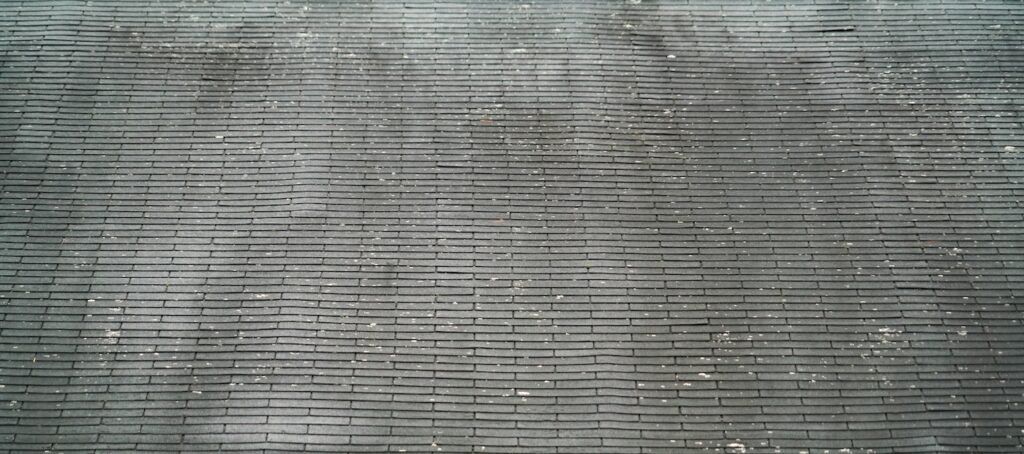
Mold thrives in damp, shaded, and humid environments. Roof shingles, especially in areas shaded by trees or exposed to frequent rain, create the perfect breeding ground. Over time, mold colonies can spread across large portions of your roof, leaving behind dark streaks and discoloration.
Beyond appearance, mold can also affect the durability of your shingles. As mold settles into the surface, it retains moisture, weakening shingle materials and making them more prone to cracking or deterioration. If ignored for too long, this can even lead to water infiltration and costly roof repairs. Understanding these risks highlights why addressing mold quickly is so important.
🦺 Safety First Before Cleaning
Before climbing onto your roof with cleaning supplies, it’s essential to prepare properly. Roof cleaning always involves some degree of risk, and taking the right safety measures ensures the job is done effectively and without injury.
Essential Safety Gear
- Non-slip shoes: Roof surfaces can become slippery when wet, so shoes with strong traction are a must.
- Gloves and goggles: Protect your skin and eyes from bleach, cleaners, or falling debris.
- Safety harness: A harness provides added protection and stability when working on steep or tall roofs.
Protecting Your Property
- Cover landscaping: Lay tarps over shrubs, flowers, and grass to protect them from cleaning chemicals.
- Rinse gutters: Clear gutters before and after cleaning to prevent clogs from dislodged mold or debris.
- Check the weather: Choose a dry, mild day for cleaning to reduce slipping hazards and ensure your solution works effectively.
Taking these precautions will make the cleaning process safer for you and gentler on your home.
🧼 Best Cleaning Solutions for Mold Removal

Choosing the right cleaning solution is one of the most important parts of the process. Some mixtures kill mold effectively but may be too harsh on shingles or landscaping. Selecting the right cleaner will protect both your roof and the area around it.
Common Roof Cleaning Options
- Bleach solution: A mixture of bleach and water (often 1 part bleach to 3 parts water) is the most effective at killing mold quickly.
- Vinegar mix: For homeowners who prefer a natural option, vinegar diluted with water can kill mold without harsh chemical residue.
- Store-bought cleaners: Specialized roof cleaning products are available at hardware stores and often include mold- and algae-fighting ingredients.
What to Avoid
- Pressure washers: The force from pressure washing strips protective granules from shingles and can shorten roof life.
- Abrasive scrubbing: Using hard brushes or scouring pads can cause surface damage, leaving shingles vulnerable to leaks.
The right cleaner paired with a gentle application method ensures you remove mold effectively without harming your roof.
📋 5 Steps to Remove Mold from Roof Shingles
Now that you’re prepared, it’s time to follow a clear process for removing mold. These five steps are designed to restore your roof while keeping it safe and intact.
- Prepare your roof and area: Set up your ladder securely, put on your safety gear, and cover nearby landscaping with tarps. Have your cleaning solution and hose ready.
- Apply the cleaning solution: Use a pump sprayer to apply your bleach, vinegar, or store-bought cleaner directly onto the moldy areas. Be sure to coat shingles evenly and allow the solution to sit for 15–20 minutes so it can kill mold at the root.
- Gently rinse the roof: Use a garden hose on low pressure to rinse the shingles. Always spray from the top downward to prevent water from getting underneath shingles.
- Repeat if necessary: For tough spots or heavy mold growth, apply the solution again and rinse a second time. It’s better to repeat gently than to scrub aggressively.
- Clean up and inspect: Once the roof looks clear, remove tarps, rinse landscaping with fresh water, and check your shingles for any signs of damage.
By following this step-by-step approach, you can effectively remove mold while protecting the structural integrity of your shingles.
💪 Preventing Mold from Returning
Cleaning mold is only half the battle. To keep your roof looking fresh and protect it long-term, prevention strategies are just as important as the initial cleanup.
Regular Roof Maintenance
- Trim overhanging branches: Allowing sunlight to reach your roof reduces damp, shaded areas where mold thrives.
- Clean gutters frequently: Clear gutters ensure proper water drainage and prevent standing water that encourages mold growth.
- Schedule inspections: Annual roof inspections help identify small mold patches or roof issues before they grow worse.

Long-Term Solutions
- Install zinc or copper strips: When it rains, these metals release particles that naturally inhibit mold and algae growth on shingles.
- Choose algae-resistant shingles: If you’re planning a roof replacement, many modern shingles are manufactured with materials that resist mold.
- Improve ventilation: A well-ventilated attic reduces humidity levels, creating an environment where mold struggles to thrive.
These preventative steps can save you time, money, and effort by ensuring mold is less likely to return after removal.
🤝 Trust Whitts Roofing for Mold-Free Roofs
Knowing how to remove mold from roof shingles is a valuable skill for homeowners who want to protect their investment, but sometimes professional help is the safest and most effective choice. Roof mold can be stubborn, and if left untreated for too long, it may be a symptom of larger roofing problems.
At Whitts Roofing, we have the expertise, equipment, and proven techniques to safely remove mold while protecting the life of your roof. Our professional team also provides inspections to ensure mold is not masking underlying damage that could lead to leaks or structural issues.
If your roof is showing signs of mold, don’t wait until it spreads further. Contact Whitts Roofing today to schedule your free inspection. We’ll restore your roof’s clean look, protect your shingles, and give you peace of mind knowing your roof is in trusted hands.
