How To Install Metal Roofing In 8 Simple Steps?
Written by
Leroy Whitt
Learning how to install metal roofing can help you understand what goes into one of the most durable, energy-efficient roofing systems available today. While metal roofing installation is best left to professionals, knowing the process gives you peace of mind and helps ensure your contractor is doing the job right.
- Long-lasting performance: Metal roofs often last 40–70 years with proper installation.
- Better energy efficiency: Reflective surfaces help reduce heat absorption and lower energy bills.
- Low maintenance: Fewer repairs and better resistance to weather compared to traditional shingles.
In this blog, we’ll break down how to install metal roofing in eight straightforward steps—from preparing your roof deck to sealing the final panel.
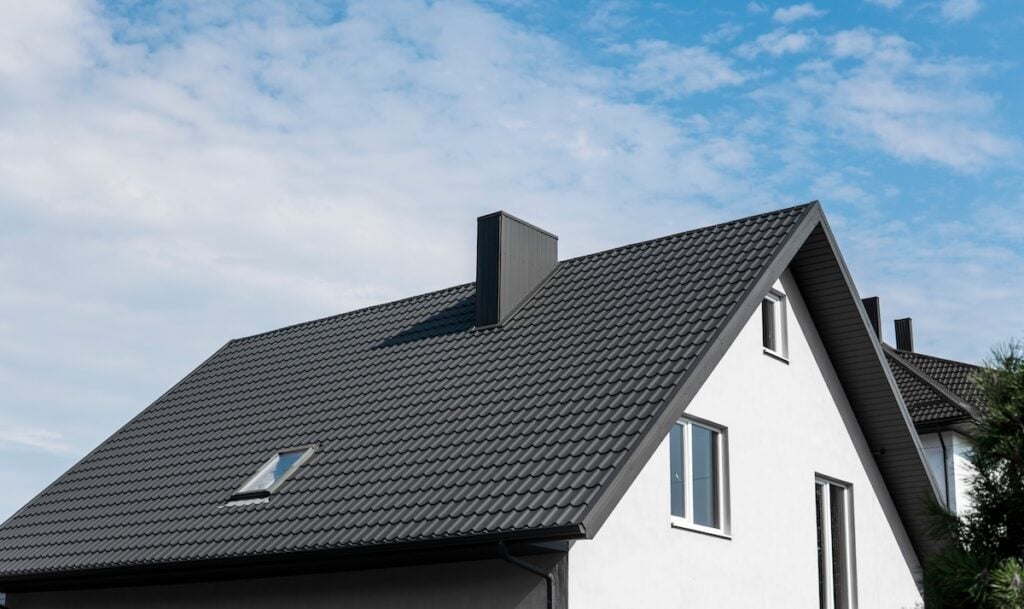
🏠 Why Homeowners Choose Metal Roofing
Metal roofing has gained popularity for its sleek look, longevity, and impressive weather resistance. It’s a great option for homeowners looking for a smart long-term investment.
Key Benefits
- Durability: Resistant to hail, high winds, and fire.
- Energy savings: Metal reflects sunlight and helps keep your home cooler.
- Minimal maintenance: No need to replace missing shingles or patch frequent leaks.
- Modern appeal: Available in a variety of colors, styles, and finishes to match your home.
Many metal roofs also come with a limited lifetime warranty, adding long-term peace of mind.
🛠️ Tools and Materials Needed for Metal Roof Installation
Before beginning a metal roofing project, you need to gather essential tools and materials to ensure a clean, safe, and watertight result.
- Metal panels or shingles: Choose aluminum, steel, copper, or zinc depending on your needs and style.
- Roofing underlayment: Acts as a water-resistant barrier between the deck and panels.
- Screws with rubber washers: Designed specifically for metal roofing installations.
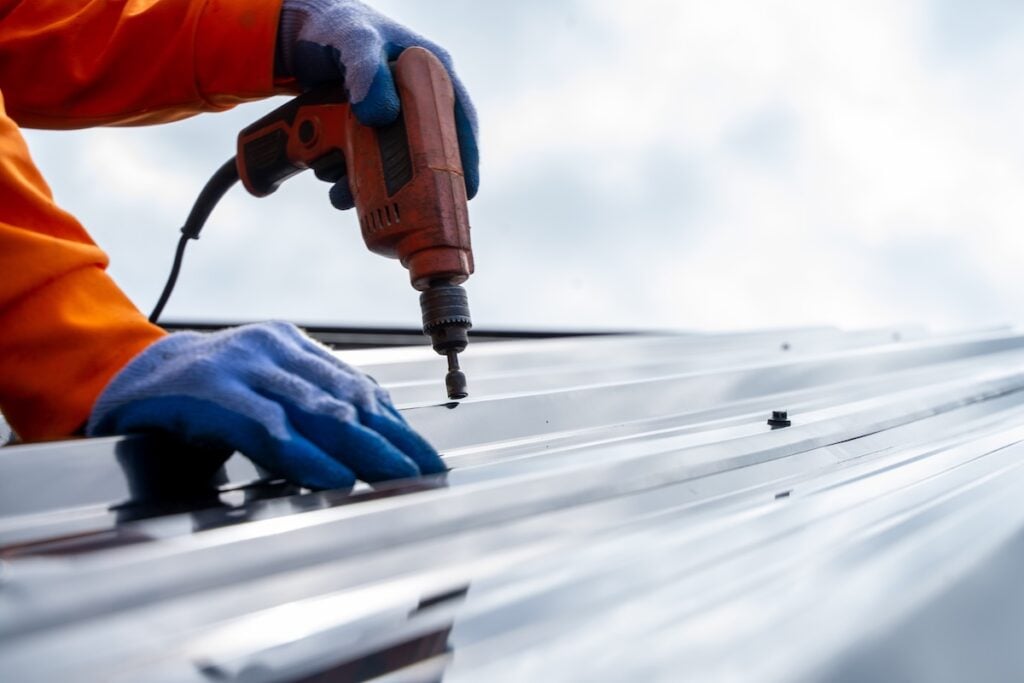
- Drill or impact driver: For driving screws into the panels and decking.
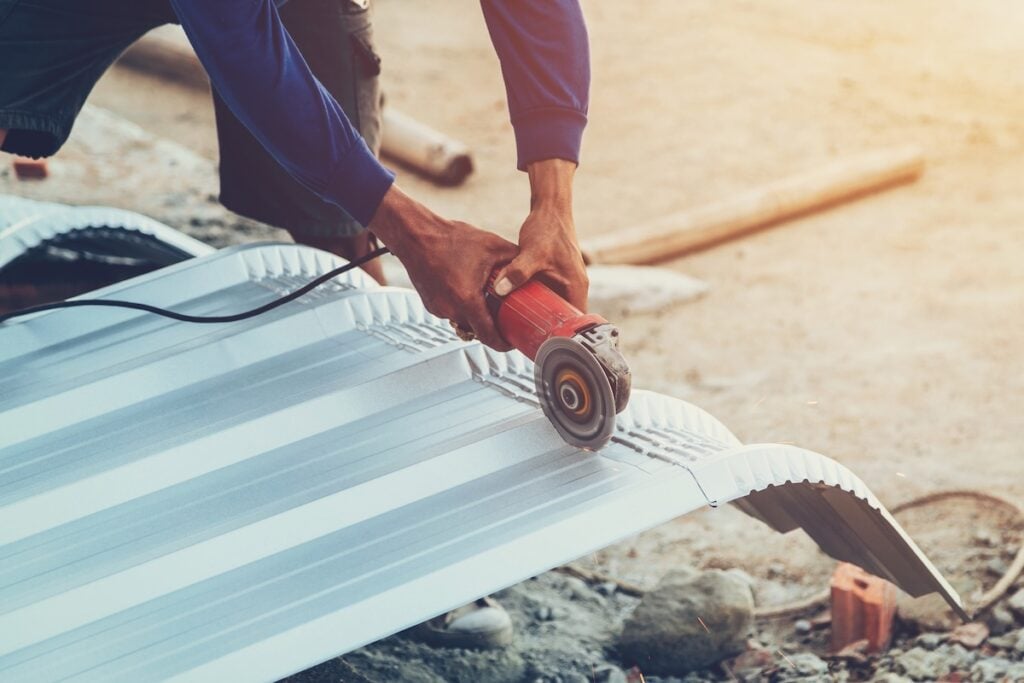
- Snips or shears: For trimming panels to fit edges, valleys, and flashing.
- Tape measure, chalk line, and level: For accurate layout and alignment.
- Roof jacks and harnesses: Safety gear is a must when working on sloped surfaces.
- Ridge caps, flashing, and closures: Ensure watertight seals at roof edges, valleys, and peaks.
✅ 8 Steps to Install Metal Roofing
While the materials and tools vary slightly depending on your roof’s design, these are the core steps involved in installing a standing seam or corrugated metal roofing system.
- Inspect and Prepare the Roof Deck
Remove old shingles or roofing material down to the decking. Check for rotted wood, soft spots, or structural issues. Repair as needed to ensure a solid base. - Install the Underlayment
Roll out synthetic or felt underlayment, overlapping each row by 6 inches. Secure with cap nails or staples, and ensure edges are sealed to prevent moisture intrusion. - Place Eave Trim and Flashing
Install metal trim along the eaves to direct water away from the fascia. Add drip edge flashing and valley flashing where needed. These components help direct water off the roof and prevent leaks. - Start Laying Panels
Begin at the longest, straightest edge of the roof. Align the first panel and screw it down at designated points—typically every 12 to 24 inches along the ribs. Ensure panels are square and plumb as you go. - Overlap and Secure Each Panel
Each subsequent panel should overlap the previous one by one full ridge (or as specified by the manufacturer). Fasten each panel securely, being careful not to over-tighten and deform the metal. - Cut Panels Around Obstacles
Use tin snips or metal shears to cut around roof vents, chimneys, or skylights. Add custom flashing around these areas and seal well to avoid leaks. - Install Ridge Cap and Closure Strips
At the peak of the roof, place closure strips and install the ridge cap. These pieces help prevent moisture, wind, and critters from entering the roof cavity. - Seal Fasteners and Edges
Apply a bead of metal roofing sealant over all screw heads, flashing seams, and edges for extra protection. This step is crucial for keeping water out and extending your roof’s life.
❗️ Common Mistakes To Avoid
Installing a metal roof isn’t just about placing panels. Precision and attention to detail are critical. Avoiding common mistakes will prevent major problems later.
Skipping Underlayment
- Why it matters: Underlayment protects against moisture buildup and temperature fluctuations.
- Solution: Always use high-quality synthetic underlayment designed for metal roofing systems.
Incorrect Fastener Placement
- Why it matters: Improper screw spacing or overtightening can cause leaks or deform panels.
- Solution: Follow the panel manufacturer’s fastener pattern exactly.
Ignoring Flashing Details
- Why it matters: Inadequate flashing is a major cause of roof leaks, especially around vents or valleys.
- Solution: Carefully measure and install flashing at all transition points with a tight seal.
📋 How Metal Roofing Compares to Shingles
Homeowners often compare metal roofs to asphalt shingles when deciding what’s best for their home. Here’s how they stack up:
- Longevity: Metal can last 2–3 times longer than standard shingles.
- Weather resistance: Better against hail, fire, and wind.
- Heat performance: Reflects sunlight, helping reduce cooling costs.
- Triple layer protection: Many metal systems offer layered protection against impact, water, and thermal changes.
- Appearance: Metal panels offer modern lines and clean aesthetics. Some come with multiple granule colors or textured finishes for added visual depth.
While the initial investment for metal is higher, the long-term return is hard to beat.
🤔 Can You Install Metal Roofing Over Shingles?
Yes—under specific conditions. Installing metal roofing over one layer of shingles is allowed in some cases, but only if:
- The existing roof is in good condition with no missing shingles or soft decking.
- Local building codes allow it.
- A vapor barrier or purlin system is added to reduce condensation.
- Weight limits are not exceeded.
Still, a full tear-off is often recommended to inspect the decking and avoid trapping moisture underneath.
👷 Should You DIY or Hire a Professional?
Installing metal roofing requires experience, precision, and safety protocols. While skilled DIYers might handle small sheds or workshops, a full residential roof is best handled by a licensed contractor.
Why Hire a Pro?
- Expert layout: Professionals ensure panels are aligned perfectly from the start.
- Seamless flashing: Properly installed flashing prevents costly leaks.
- Warranty protection: A limited lifetime warranty may only apply if installed by a certified contractor.
- Safer process: Professionals use fall protection and work efficiently, even on steep slopes.
If you’re investing in metal for its durability and longevity, professional installation ensures you get the most out of that investment.
👍 Know the Process, Hire the Best
Understanding how to install metal roofing helps you make confident decisions when it’s time to upgrade your roof. With a cleaner look, longer lifespan, and strong protection against the elements, metal roofing is one of the best options available for modern homeowners.
At Whitt’s Quality Roofing, we install premium metal roofing systems with triple-layer protection, expert craftsmanship, and options backed by a limited lifetime warranty. Contact us today for a free roof inspection, and we’ll help you determine if a metal roof is right for your home—installed the right way, the first time.
